 Broken Crimp
Add holds to your climb
A climb mapped on a photo needs no holds at all. Add a hold when you want to name what you are holding, like a crimp or a sloper, or to attach a close-up or a voice note to it. The moves you already set go onto the holds you add. There are 37 types of hold to choose from.
Indoors, the holds usually show up well enough in the photo. Outdoors they can be hard to pick out from the rock, and placing holds over the photo helps the line stand out.
1. Find your moves on the Holds tab
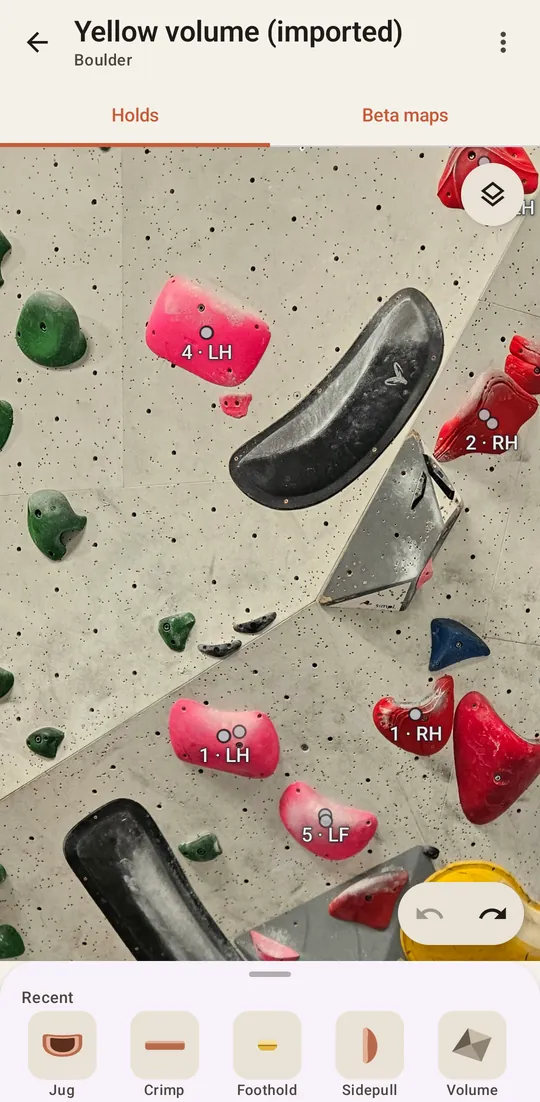
If you have already mapped a beta on the photo, open the Holds tab. Each small dot marks a spot where a hand or foot goes in one of your moves, so you can see where each hold belongs. A dot goes away once you place a hold on it.
Dots from the beta you have open are labelled: 4 · LH is move 4, the left hand. Dots from your other betas on the climb show too, without a label. If you haven’t mapped a beta yet, there are no dots, and you can place holds anywhere.
2. Pick a hold
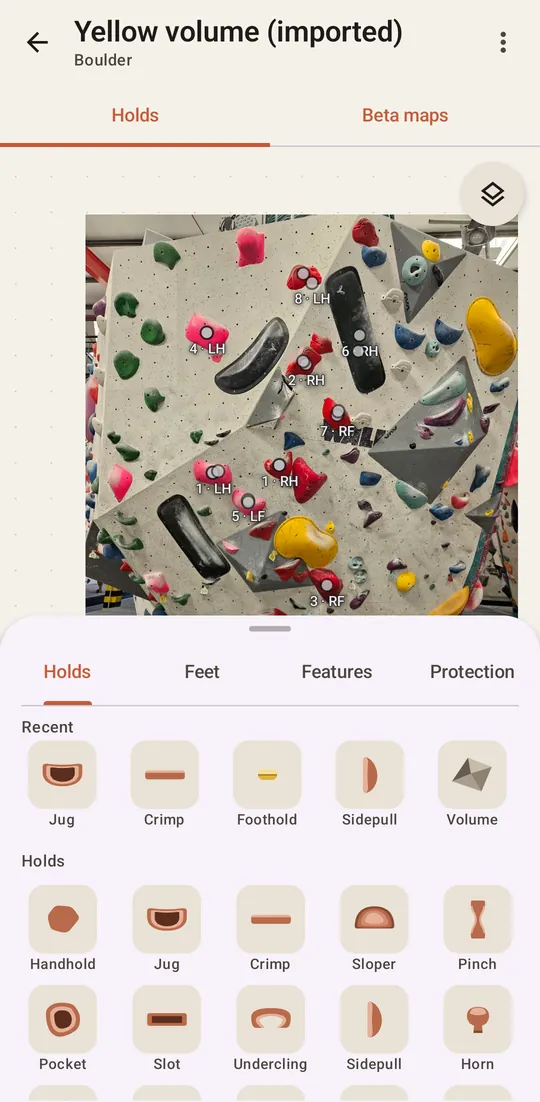
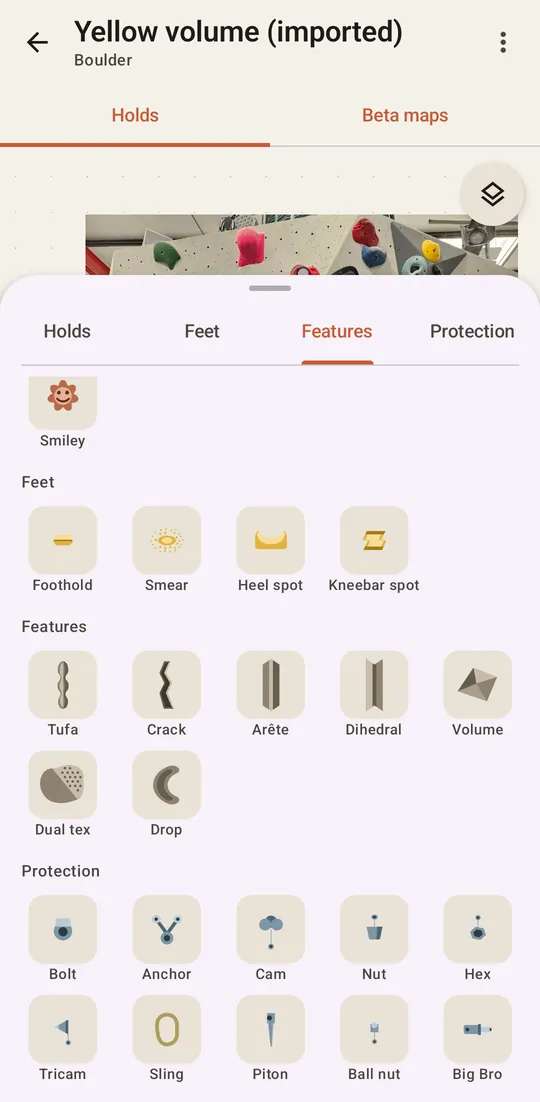
The drawer at the bottom of the Holds tab holds your recent holds. Drag it up to see the rest under Holds, Feet, Features and Protection.
3. Place it on a move
Tap a hold in the drawer, then tap the wall on or close to a dot. The hold snaps onto the dot, and the moves there go onto the hold, in every beta on the climb.
Or tap the dot itself. Pick a type in Place a hold here, and the hold goes straight onto that spot.
4. Adjust it
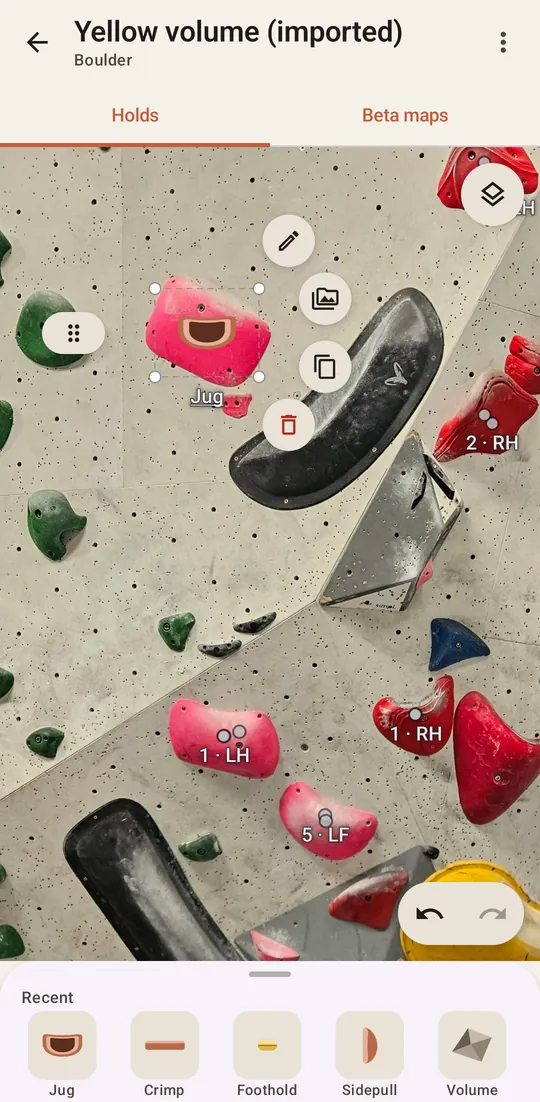
The hold you placed is selected. Around it:
- Drag a corner to resize or turn it.
- Drag the capsule beside it to move it.
- The buttons on its other side edit it , attach photos and voice notes , duplicate it and remove it .
 to resize or turn it.
 beside it to move it.
 , attach photos and voice notes
 , duplicate it
 and remove it
 .
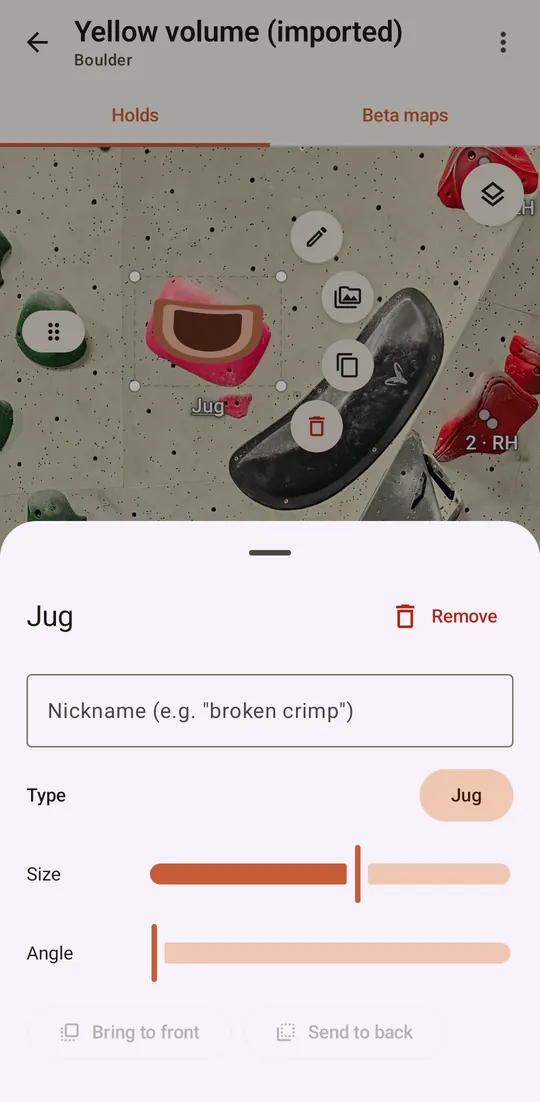
The edit button opens a panel with a nickname, the type, Size and Angle. Bring to front and Send to back decide which hold is on top where two overlap.
To select a hold later, tap it.
5. Move or remove a hold that has moves on it
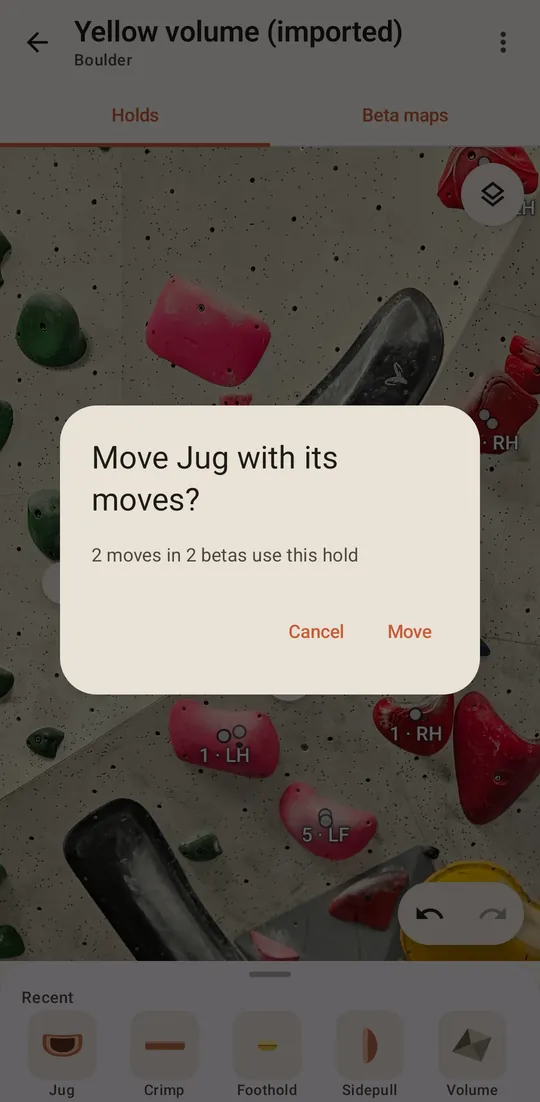
Small nudges just happen. If you drag the hold further, the app asks first and says how many moves use it. Move takes its moves along, and Cancel puts the hold back.
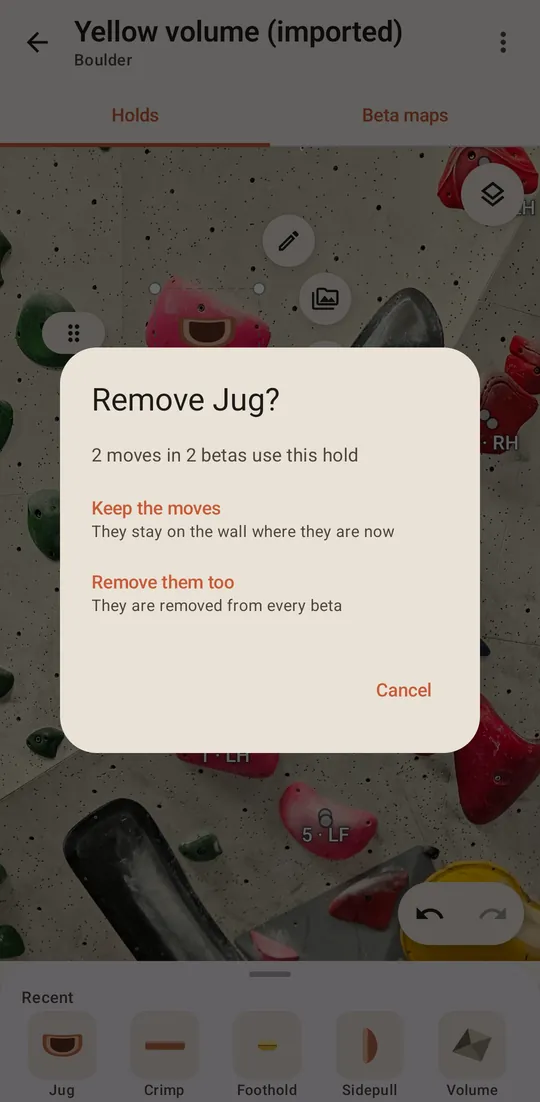
Press the hold’s bin , and the app asks what happens to its moves:
- Keep the moves leaves them on the wall where they are, as dots again.
- Remove them too removes them from every beta.
6. Place several of the same hold
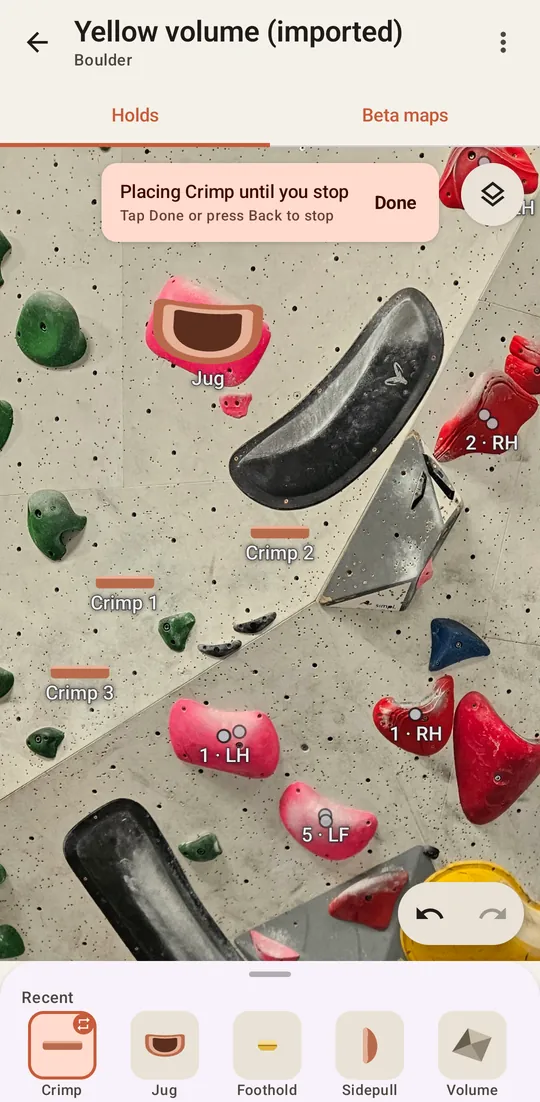
Long-press a hold in the drawer to keep placing it, one tap at a time. Press Done or Back to stop. The app numbers holds of the same type for you.
7. Add a hold under every move
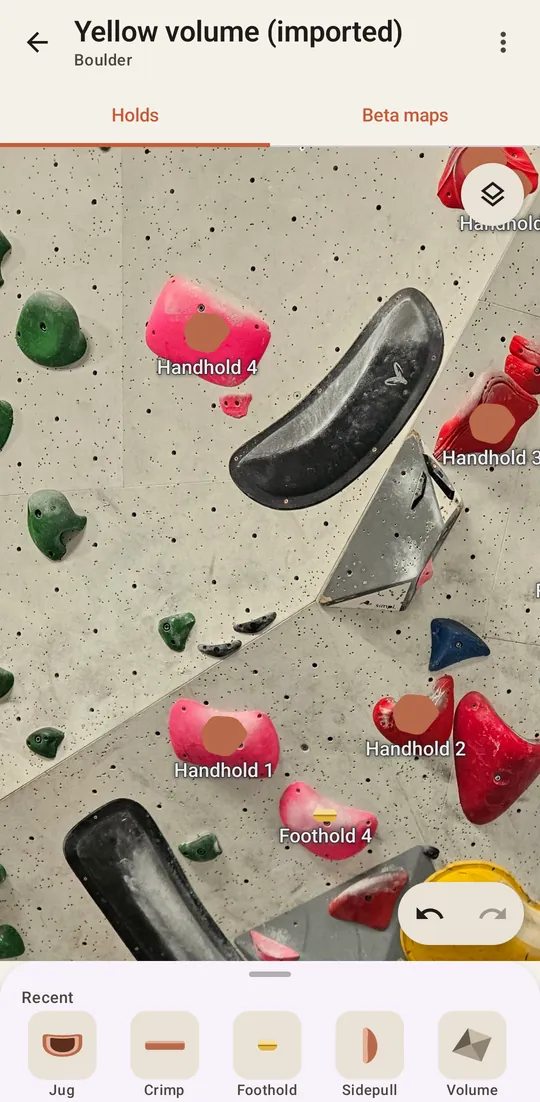
To do them all at once, choose Add holds under the moves in the menu on the Holds tab. Each spot gets a plain hold: a foothold where only feet go, and a handhold everywhere else. Tap one to change its type or give it a name. Undo takes them all back.
8. If you remove the photo
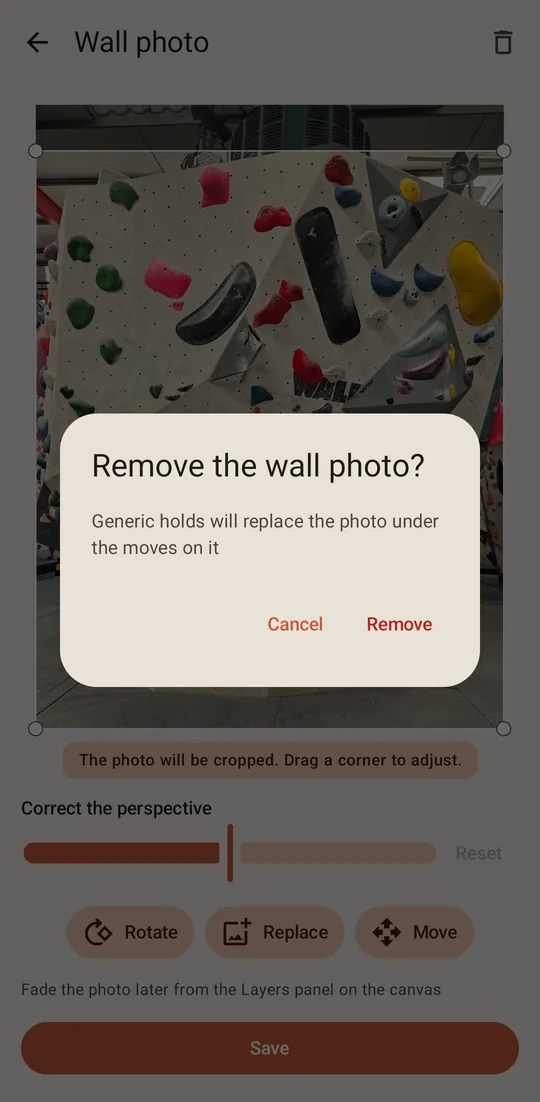
Your moves need something under them once the rock has gone. Open Layers, choose Edit photo…, and press the bin at the top right. The app warns you that plain holds will take the photo’s place under the moves.
The same plain holds appear when you share the climb without its wall photo.
Next
The Holds tab also splits a climb into sections and writes on the wall.